Páginas

Dec 25, 2010

Minimalist lamp - abajur minimalista


Olá!
Antes deste post, que será o ultimo deste ano, quero avisar sobre algumas mudanças no blog :)
Bom, como devem ter notado, este mês fiz uma postagem a cada quinze dias, pois ando muito ocupado, então, o ano que vem continuará assim, teremos uma postagem a cada duas semanas. Porém, se você me enviar seus projetos, poderemos ter mais postagens! Colabore!
Além disso, como disse acima, este é o ultimo post deste ano, pois tirarei umas férias e retornarei com novos projetos no dia 14 de Janeiro de 2011!

Hello!
Before today's post, which will be this year's last one, I want to tell you about some changes that will happen on the blog. =)

Well, as you might have seen, this month I made one post every two weeks (I have been very busy) so, next year, I will have to post every two weeks also. But, if you send me your projects, we can have more posts!
 And another thing is, as I said before, this will be this year's last post. I will have vacations and will return on January 14th.

Bom, vamos ao produto de hoje:
Também desenvolvido por mim, este é um abajur "minimalista", não foi feito com a intenção de ser minimalista, mas sim pensando em utilizar somente o mínimo necessário. Um conceito que gosto bastante e acho primordial dentro do rol do ecodesign e sustentabilidade.

Ok, let's go to today's project:
Also developed by me, this is a "minimalist" lamp; It wasn't though with the intention to be "minimalist", but it was projected to aim the concept of "the less possible", what I mean is, to use only the necessary amount of materials. This is a concept that I like and which I think it is very important concerning sustainability and ecodesign.


Bom, vamos lá, é bem simples:
Você precisa de: arame, material elétrico (soquete, interruptor, plug, fio e lâmpada), alicates e parafusos (ou algo para fazer uma base)

So, all you need is: Wire, electric material (lamp socket, plug, switch, flex and a lamp), pliers and screws.


Primeiro começamos montando toda a parte elétrica, se você não souber como se monta uma, no google é fácil encontrar tutoriais, é bem simples. Se quiserem, posso colocar um passo a passo qualquer dia aqui (é só pedir).

The first step is to assemble the electric part, if you don't know how to assemble it you can easily find tutorials on google. But if you want, I can publish a "step-by-step" here, so, just ask me if you need!


Após isto, molde o arame como preferir (no caso eu enrolei dois arames para dar mais força).

After that, just give some shape to the wire (I decided to twist to parts together to give more strength to the object).


Depois por último, a base. Como eu tenho um painel furado no meu quarto, eu decido prende-lo com parafusos, mas você pode fazer como mandar sua necessidade/criatividade (pode prender a uma madeira, pregar na parede com parafusos, etc.).

Then, the base; as I have a panel with holes on my wall; I decided to attach the lamp there, so I added the screws to the wire and placed it on the panel. But you can do whatever you want to create a base (you can attach is to some wood, or puts it on a wall with screws, and so on... the limit is your creativity, therefore, there is no limit!)


É isso!
Desejo um feliz natal e ótimo ano novo a todos os que comemoram!
Boas férias, até dia 14!

That's it!
I wish, for those who celebrate, a happy Christmas and a wonderful new year!
See you on January 14th

Obrigado!
Thanks!

Projeto por Nicholas B. Torretta
Project by Nicholas B. Torretta


Dec 11, 2010

Paper Shred Lampshade – Abajur deRetalhos de Papel


Olá! Primeiro, desculpem pela falta de post na semana passada (resultado da correria de fim de ano). E quero também explicar uma coisa que muita gente tem me perguntado: sobre a autoria dos projetos. Todos os projetos que coloco aqui com passo a passo são de minha autoria (exceto pelo gargalo para garrafas e os exemplos retirados de livros). Por isso, para não deixar mais a dúvida, colocarei o nome do autor do projeto antes de mostrá-lo. =)
Bom, o exemplo de hoje é, de minha autoria, um abajur com retalhos de papel. Bem simples e com um resultado estético bem interessante. Vamos lá:

Hello! First of all I want to apology by the lack of post last week (result of the end of year’s hurry). Another thing that I want to make clear, because many people are asking about, is about the author of the projects: All the projects that I post here with the “step by step” were developed by me (except for the bottleneck for bags and the examples from books). Therefore, I’m going to put the name of the author before every project. =)
Well, today’s example, also developed by me, is a lampshade made with paper shred; very simple and with a very interesting aesthetic result. Here it is:

Você precisa: de uma base para lâmpada (eu tive a sorte de encontrar esta pronta na rua), retalhos de papel, régua, estilete, pincel, cola e uma folha de papel tamanho A3.

All you need is: A base for a lamp (I had the luck to find this one on the street), paper shred, a ruler, a cutter, a brush, glue and a white paper (size A3).


Primeiro, com o papel A3, meça o tamanho da circunferência que você vai fazer com o papel, então recorte 4 faixas no tal tamanho.

First, with the A3 paper, measure the circumference that you will make with the paper, and then cut 4 strips of the paper in that size.


Passe cola em uma faixa e vá colando as tiras de papel (retalhos).

Put the glue on one of the strips and glue the paper shreds.


Após colar todas, cole uma faixa na parte superior.

After you glued the paper along the entire strip, glue another strip on the top of the assemblage.


Depois, repita os mesmos passos, mas faça com retalhos menores.

After that, repeat the same steps but now with shorter paper shreds.


Após isto, cole a montagem maior em cima da menor (faixa com faixa)

Then glue both assemblages together, the bigger one on top of the smaller (strip with strip)


Agora é só enrolar e colocar na base da lâmpada (tem que ser lâmpada fluorescente né, senão terás uma fogueira ao invés de um abajur)

Now you just need to roll the whole set around the lamp’s base and it is ready. But remember, you need to use fluorescent light bulbs; otherwise you will have a bonfire instead of a lampshade!


Pronto!
That is it!

Obrigado!
Thanks!

Project by Nicholas B. Torretta
Projeto por Nicholas B. Torretta

Nov 26, 2010

Center table - mesa de centro


Olá! Aqui vai um exemplo muito simples, uma mesa de centro com um poster e um galão de tinta:
Tudo que você precisa é: um galão de tinta (vazio né), um pôster velho, uma furadeira, uma broca para metal e uns parafusos.

Hello! Here goes a very simple example, a center table made with an old poster and an ink gallon.
All you need is: an ink gallon (empty, of course), an old poster, a drilling machine, a drill for metal and some screws.


Primeiro faça furos na lata de acordo com o numero de parafusos que você tem (o ideal é 3 ou 4).

First, do the holes on the gallon acording to the number of screws that you have (preferentially 3 or 4). 


Depois posicione a lata centralizando no verso do pôster.
After that, center the gallon on the back of the poster


(Você pode notar aqui que eu pintei a lata para dar uma aparência melhor)
(You can see that I painted the gallon to get a better appearance)


Coloque os parafusos (se necessário, faça furos no verso do pôster com uma broca bem pequena para “abrir caminho” pros parafusos)

Now just put the screws (if you need, you can make some holes with a very small drill on the back of the poster just to “open the way” to the screws).


E pronto!
And it’s ready!


Outra opção de acabamento é colocar algum tipo de borracha na parte que 
ficará em contato com o chão.

Another finishing option is to put some rubber on the region which will be in contact with the floor.


Obrigado!
Thanks!

Nov 21, 2010

Examples of how to reuse different things - exemplos de reutilização de vários objetos


Olá!

Mais uma vez atrasado aqui, final de ano é sempre uma correria, por isso tenho tido menos tempo de preparar coisas para cá. Também por isso, o post hoje não é de um "passo a passo", mas sim de várias referências super interessantes para se inspirar para construir nossos próprios produtos.

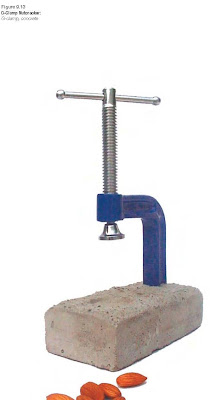
São do livro "Sustainable by Design: Explorations in Theory and Pratice"  do Prof. Stuwart Walker, um livro muito bom que recomendo a todos que se interessam por design sustentável, ecodesign, mudanças na cultura material, experimentações em design e conceitos muitos interessantes sobre mudanças na conceituação de design.

Seguem aqui alguns exemplos muito bons retirados do livro:


Hello!

Once again I'm late. End of year is always a busy time, therefore I have had not enough time to prepare thing for this blog. Because of that, today's post isn't a "step by step"; today I'm going to show a lot of very interesting examples which we can use to get inpired to create our own products.

The examples are from the  book "Sustainable by Design: Explorations in Theory and Pratice" by Prof. Stuwart Walker. This is a book which I highly recommend for everyone who is interested in sustainable design, ecodesign, changing material culture, design experimentations and new concepts of design.

So, here are some really good examples:


Obrigado!

Thanks!

Nov 12, 2010

Multifunctional holder - Suporte multifuncional


Ola!
Hello!

Como prometido, hoje vai um produto com passo a passo. O exemplo desta semana é bem simples e com muitas funções. É um apoio para diversas coisas como fotos, notas, lápis, etc.
As I promised, today we have an example with “how to make” it. This week’s example is very simple and has a lot of function. It is a holder for many things, such as: photographs, notes, pencils, and so on.


Tudo que você precisa é: um furador, uma tesoura, um cordão (fio, barbante, etc.) e porta documentos (mais de um).

All you need is: scissors, some kind of string, a holing pincer, and some kind of “document wallet” (more than one).


Primeiro, faça um furo em cada canto dos porta documentos.
First step: make holes at each corner of the “document wallet”.


Depois una todos com o cordão.
Then join all the documents wallets with the string.


Você pode também fazer algo como na foto, para pendurar de outra forma que não diretamente  pelos furos.

You can also do something as shown on the picture to hang it in a different way than directly through the holes.


É isso! simple não?
That’s it! Easy, isn’t it?!


Se você tiver seu projeto, nos envie para viraroque@gmail.com !
If you have a project, please, send it to viraroque@gmail.com !

Obrigado!
Thanks!

Nov 5, 2010

Suporte - holder


Oi!
Hello!

Como esta semana foi curta (feriado, eleição, etc.) e estive bem ocupado, o post de hoje teve que ser mais simples. São soluções diferentes de como guardar seus livros, revistas e jornais. Estou colocando exemplos que eu já tinha feito aqui em casa, por isso, infelizmente não tem o passo a passo, mas vou tentar explicar ambos:
Prometo que semana que vem terá um novo produto mais interessante e com passo a passo!

As this week was very short (we had holidays and election here in Brazil) and I was very busy, today’s post is smaller. Here you will see some examples about how to keep your books, magazines and newspapers in a creative way. As these examples are thing that I have in my house for a long time, today I couldn’t show the “how to make it”, but I’ll try to explain both.
I promise that next week I’ll post something more interesting!


O primeiro é bem simples, é um “calceiro”, uma espécie de gaveta para pendurar calças, muito encontrado em armários mais antigos.

The first one is very simple, it is a “drawer to hold pants”, which is mostly found in old wardrobes.


Como eu não o usava, retirei-o do armário, apoiei na parede e pendurei umas revistas e jornais; simples assim, sem precisar de nenhuma transformação na peça. Mas se você quiser você pode colocar pés, empilhar mais de um, etc.
 Vai aqui um exemplo de uma mesa de canto com um “calceiro”, um cavalete de pintura e um balde que um grupo de alunos do projeto Design de Perifa fizeram quando eu e o Marcelinho Barros aplicamos oficinas pelo Design Possível.

As I didn’t use it, I removed it from the wardrobe and put some magazines and newspaper on it. No transformation was needed, but, if you want, you can do whatever you want.  Here is an example of a table that students from the “Design de Perifa” made when I and Marcelinho Barros did the workshops for the NGO Design Possível 


O outro exemplo também é simples: usar os pratos de plantas para colocar seus livros. Se você tiver um suporte para plantas, só precisa pendurar os pratos um em baixo do outro, a dica é, nos pratos que você colocará os livros, pendure o prato de cabeça para baixo para dar melhor apoio aos livros. Fico imaginando como ficaria legal utilizando outra coisa no lugar dos pratos plasticos, como algo de madeira ou metal, uma calota? Quem sabe?

The second product is simple also: use those “plates used to support plant vases” to support your books. All you need to do is to turn one plate upside-down and put your books on it. I think it would look good if using something else (some plate made of wood or metal) instead of using those plastic plates...


Obrigado!
Thanks!

Oct 30, 2010

relógio com latas/ clock whith cans


Olá!
Hello!

O exemplo de hoje é simples e pode render resultados estéticos bem variados. Um relógio feito com latinhas.
Today's simple is very simple but we can very many different aesthetic results from it. It is a clock made with cans.

Você precisa de: uma tesoura qualquer, superbonder, um relógio simples, uma fita dupla-face (opcional) e, claro, latas de alumínio.

You need: scissors, superbonder, a clock, a double-faced tape (optional) and, of course, aluminum cans.


Primeiro recorte as latinhas no formato que você desejar, eu aqui escolhe um formato meio "gota"

First of all, cut the cans into the shape you prefer.


Faça um furo no meio de um dos pedaços e coloque o relógio nele (você tem que tirar os ponteiros antes)

Make a hole at the center of some piece and place the clock on it (you need to remove the watch's hands before) 


Então fixe todas as outras peças de alumínio como você preferir.

And then assemble all the other aluminum parts as you want.


Quando terminar, fixe o relógio no alumínio, aqui eu usei a fita dupla-face, mas você pode usar o superbonder também


When you finish it, fix the clock on the aluminum, here I used the tape, but you can also use the superbonder glue.


Então é só montar os ponteiros novamente, você pode manter os originais ou cobri-los com algo (eu usei cartolina preta).

Then you have to assemble the hand again, you can keep the original ones or, as I did, cover them with something (I used black paper)


É isso!
That's it!

Dúvidas, sugestões, elogios ou críticas: deixe seu comentário!
Quer nos enviar teu projeto? Mande-o para viraroque@gmail.com


Doubts, suggestions, praises or critics: leave your comment!
Do you want to send us your project? Send it to viraroque@gmail.com

Obrigado!
Thanks! 

Oct 23, 2010

Workshop na/at FAAP

Ontem, sexta feira dia 22 aconteceu um workshop “Virar o quê?” pela Semana Acadêmica de Artes da FAAP, vejam mais sobre o que fizemos:
Yesterday, Friday, happened a “Virar o quê?” workshop at FAAP for the “Academic Arts Week”, check out what we did:

Para começar discutimos diversos tópicos sobre os temas: design atual, sociedade de consumo, consumidor criador, sustentabilidade, cultura material, influências e modismos, ecodesign e design vernacular. Uma discussão que rendeu muita conversa e resultou em conceitos muito interessantes!
In the beginning we talked a lot about the following subjects: contemporary design, consumerism, consumer-creator, sustainability, material culture, influence and fashion, ecodesign and vernacular design. A discussion which resulted in many interesting concepts and ideas! 

Após isso passamos para a hora do “mão na massa”, direcionado pelo conceito de “projeto sem projeto”, projeto imediato (gambiarra) e reutilização.
After that we went to the “hands on” time, aimed by the concept of “projet without project”, immediate designing and reuse.


Os participantes começaram explorando o material disponível: sucatas recolhidas nas ruas de São Paulo durante dois dias (com a enorme ajuda do amigo e participante Walter (Cuco)).
The participants started by exploring the available materials: scraps which were collected during two days on the streets of São Paulo (with the huge help from my friend Walter (Cuco))


Então passaram ao projetar sem desenhos, quebrando a cabeça em como chegar ao resultado esperado.
So they began to design without drawings, therefore, they had to make experiments pilling up the scraps. 


Com o uso de ferramentas simples (furadeira, serra e martelo) tiveram que construir uma mesa e dois “objetos para sentar” que acompanhassem a mesa.
Whit the use of simple and accessible tools (drilling machine, hand-saw and hammers) they had to build a table and “seating devices” to use with the table

Após muitas ideias e cooperação os produtos foram começando a tomar forma.
After many attemps, ideas and cooperation, the product began to take shape.


E ao fim das quatro horas de workshop eis os produtos resultantes:
And after 4 hour of workshop, these are the final products:

Um banco super multifuncional que varia de display, prateleiras modulares até o banco propriamente dito.
A multifunctional bench which can be a display, modular racks and, of course, a bench.


E uma mesa que deixa a pergunta de “qual é sua frente?”
And a table which makes us think: “which part is its front?”


Por ultimo e não menos importante eu quero agradecer a toda equipe da Faculdade de Artes da FAAP (coordenação, pessoal das oficinas, professores e equipe do D.A) por terem possibilitado o acontecimento do workshop com todos os equipamentos necessários e, claro, pelos participantes!!
At last, but not less important; I want to thank everybody from FAAP (the coordination, the staff from the woodshop, the teachers and everybody from the D.A) for making the workshop possible and, of course, all the participants!


Muito obrigado!
Thank you very much!

Tem dúvidas sobre o workshop, quer saber sobre a teoria discutida? Deixe seu comentário ou envie um email para viraroque@gmail.com !
Do you have doubt or questions about the workshop or you whant to know what we talked about those subjects? Leave your comment or send an email to viraroque@gmail.com !

Obrigado!
Thanks!