
Hello!
Olá!
Today’s example, also done by me, is a little bit more complicated then the others that I’ve posted here; but nothing impossible. I found these rackets some days ago and decided to build a table, I liked the result, and so, here it is:
O exemplo de hoje, também feito por mim, é um pouco mais trabalhoso que os que eu já postei aqui, mas nada impossível. Encontrei essas raquetes esses dias e resolvi fazer uma mesinha, gostei do resultado, então aqui vai:

You need: two wooden rackets, wooden “sticks”, a hand-saw, a hammer, a drilling machine, a ruler, cutter, a wood file, nails, white glue and superbonder glue.
Você precisa de duas raquetes de madeira, “barrinhas” de madeira, uma serra, martelo, furadeira, régua, lápis, estilete, limas, além de pregos, cola branca e superbonder.
As this product is a little bit complicated, I separated the step in two parts: top and base, to make easier to understand. Let’s go:
Como esse produto é um pouco mais complexo, separei em duas partes: tampo e base, para facilitar. Vamos lá:
Top - Tampo:

First, mark on the racket where will cut it, remember that, as longer you leave the piece of cable, higher will be the table.
Primeiro marque no cabo da raquete onde você vai cortá-la, lembre que quanto mais o pedaço restante de cabo, maios a altura da mesa. Por isso eu deixei o máximo possível de cabo.

After that you can put a tape if you want, to align the places where you are going to saw.
Depois de marcar, você pode colocar uma fita como na imagem para marcar melhor e alinhar o corte.

Now, just saw it.
Agora é só cortar na parte indicada.


Now put the pieces as they are going to be assembled and mark the part where they touch each other.
Posicione as peças como elas serão montadas e marque a parte onde elas irão encostar.

Sand that area so that the glue fixes better.
Lixe a parte onde será a junção para que a cola fixe melhor.

Put white glue between the pieces and then superbonder around it to hold the pieces in place while the white glue dries.
Coloque cola branca entre as peças e depois superbonder por fora só para fixar enquanto a cola branca seca.

Now, with a drill (which must be thinner than the nail that you have) make some holes on the joints
Agora, com uma broca (que deve ser um pouco mais estreita que o prego que você possuir) faça um furo em cada junção.

Now, carefully, hammer a nail into the hole.
Agora, cuidadosamente martele um prego no buraco para prender bem as partes.

Now set the two assembled rackets in a laytou that you prefer (here I decided to pu then as shown on the picture) and then, mark with a pencil the point where you are going to join them together.
Posicione as duas raquetes já “dobradas” conforme você vai querer que elas fiquem ao final, eu aqui escolhe como mostra a foto. Então marque com um lápis um ponto no meio onde você unirá as duas.
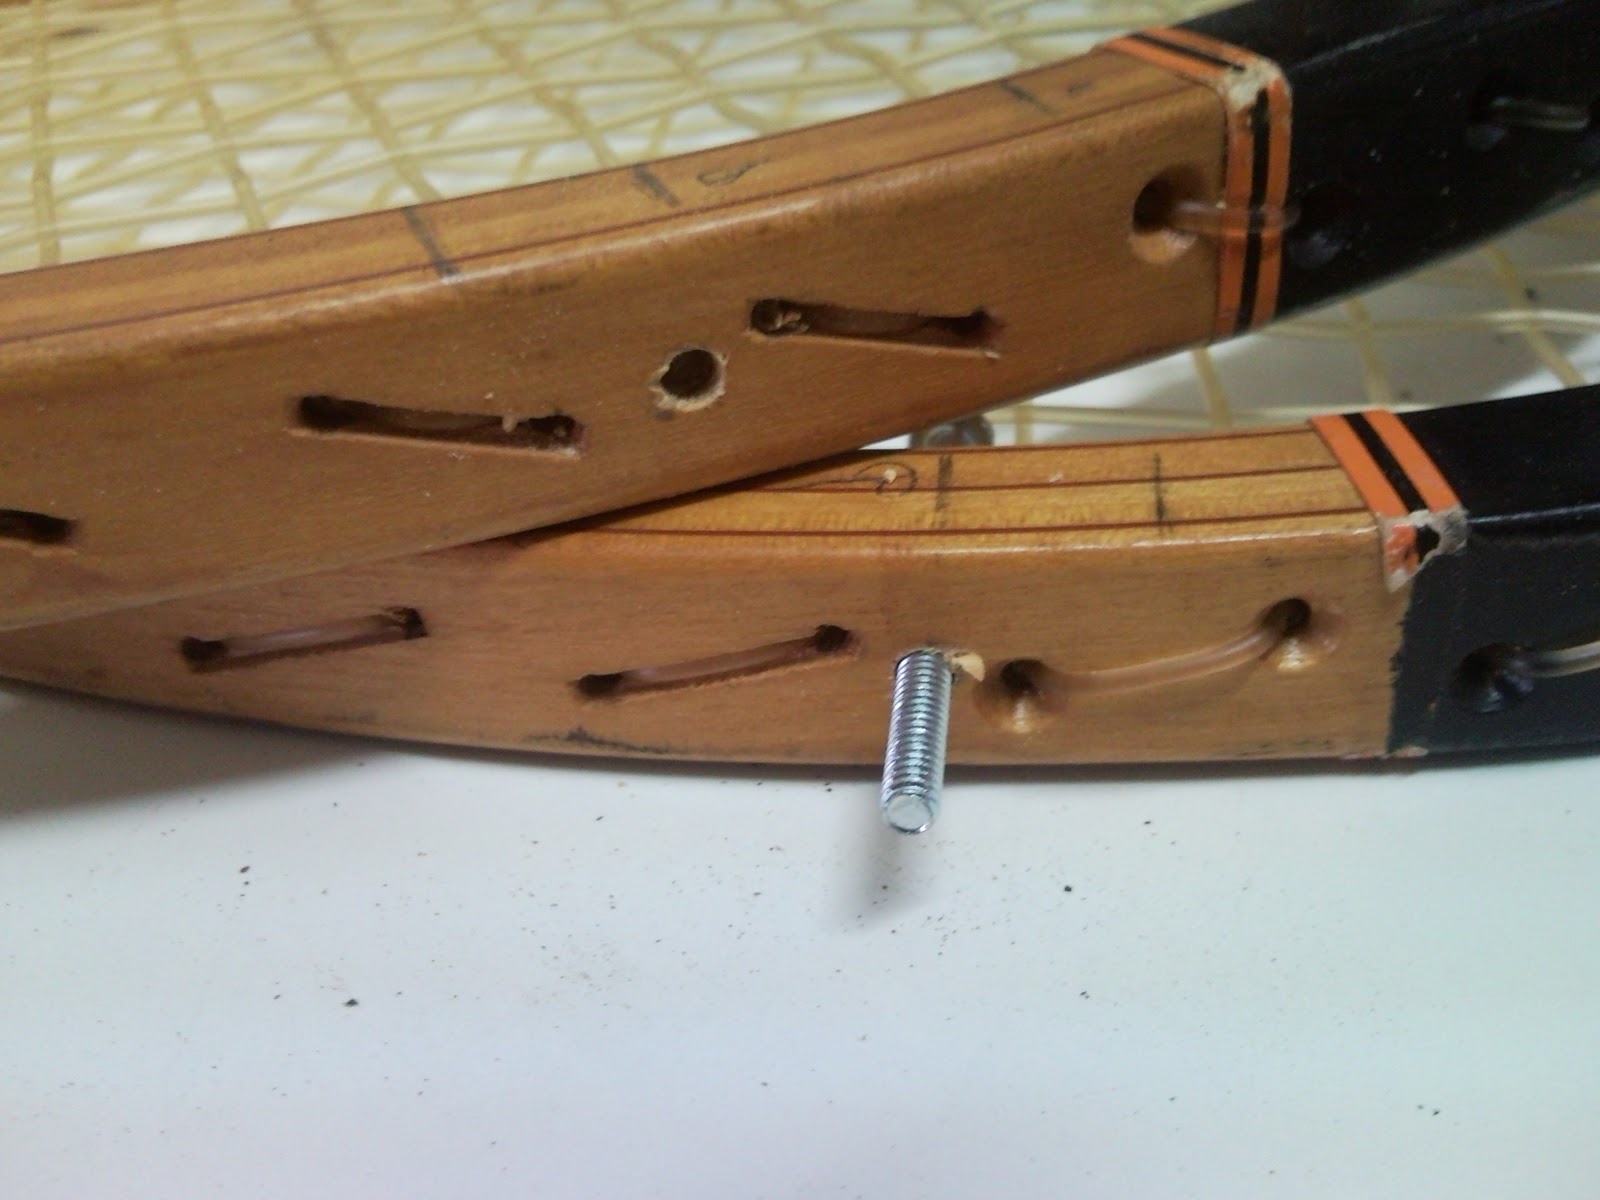

Make one hole on each one and join them; here I used a screw and a nut to join.
Faça um furo em cada uma e una; aqui eu usei um parafuso com porca, mas se você preferir de outro modo fica a seu critério.
The base - a base:

Set the piece that you assembled on a piece of paper and draw the shape that you want for the base. I chose a rectangle base due to the material that I had (the wooden “sticks”), but you can do the shape you prefer, according to the material that you have.
Posicione a montagem em cima de uma folha de papel para desenhar a base que você vai querer. No caso eu escolhi fazê-la quadrada por causa do material que eu possuía.

After drawing it, transfer the measures to the material.
Após desenhar, passe as medidas para o material no qual você vai fazer a base. Aqui no caso as “barras” de madeira.

Cut the pieces, here, as it is a rectangle, I had to make this cuts with a 45º angle.
Corte as peças, aqui, como é um retângulo, tive que fazer cortes de 45º para encaixar as peças.


Now put the pieces together with white glue and superbonder; you can also put a tape to hold while the glue dries.
Junte as partes com cola branca e superbonder, você pode colocar uma fita também para segurar enquanto a cola seca.
Now fix the parts, which won’t be fixed on the racket’s cable, with a nail (make a hole whit the drilling machine, than hammer the nail.
Prenda as partes que ficarão soltas (não fixadas no cabo da raquete) com um prego (faça um furo com uma broca pequena e depois passe o prego).

Now, with the top turned upside down, put the base in the position you want.
Agora, com o tampo de cabeça para baixo, coloque a base na posição.

Drill some holes to join them (one hole in each piece of wood).
Fure locais para fixação (um por pedaço de madeira).

And then, put the nails.
E coloque pregos.
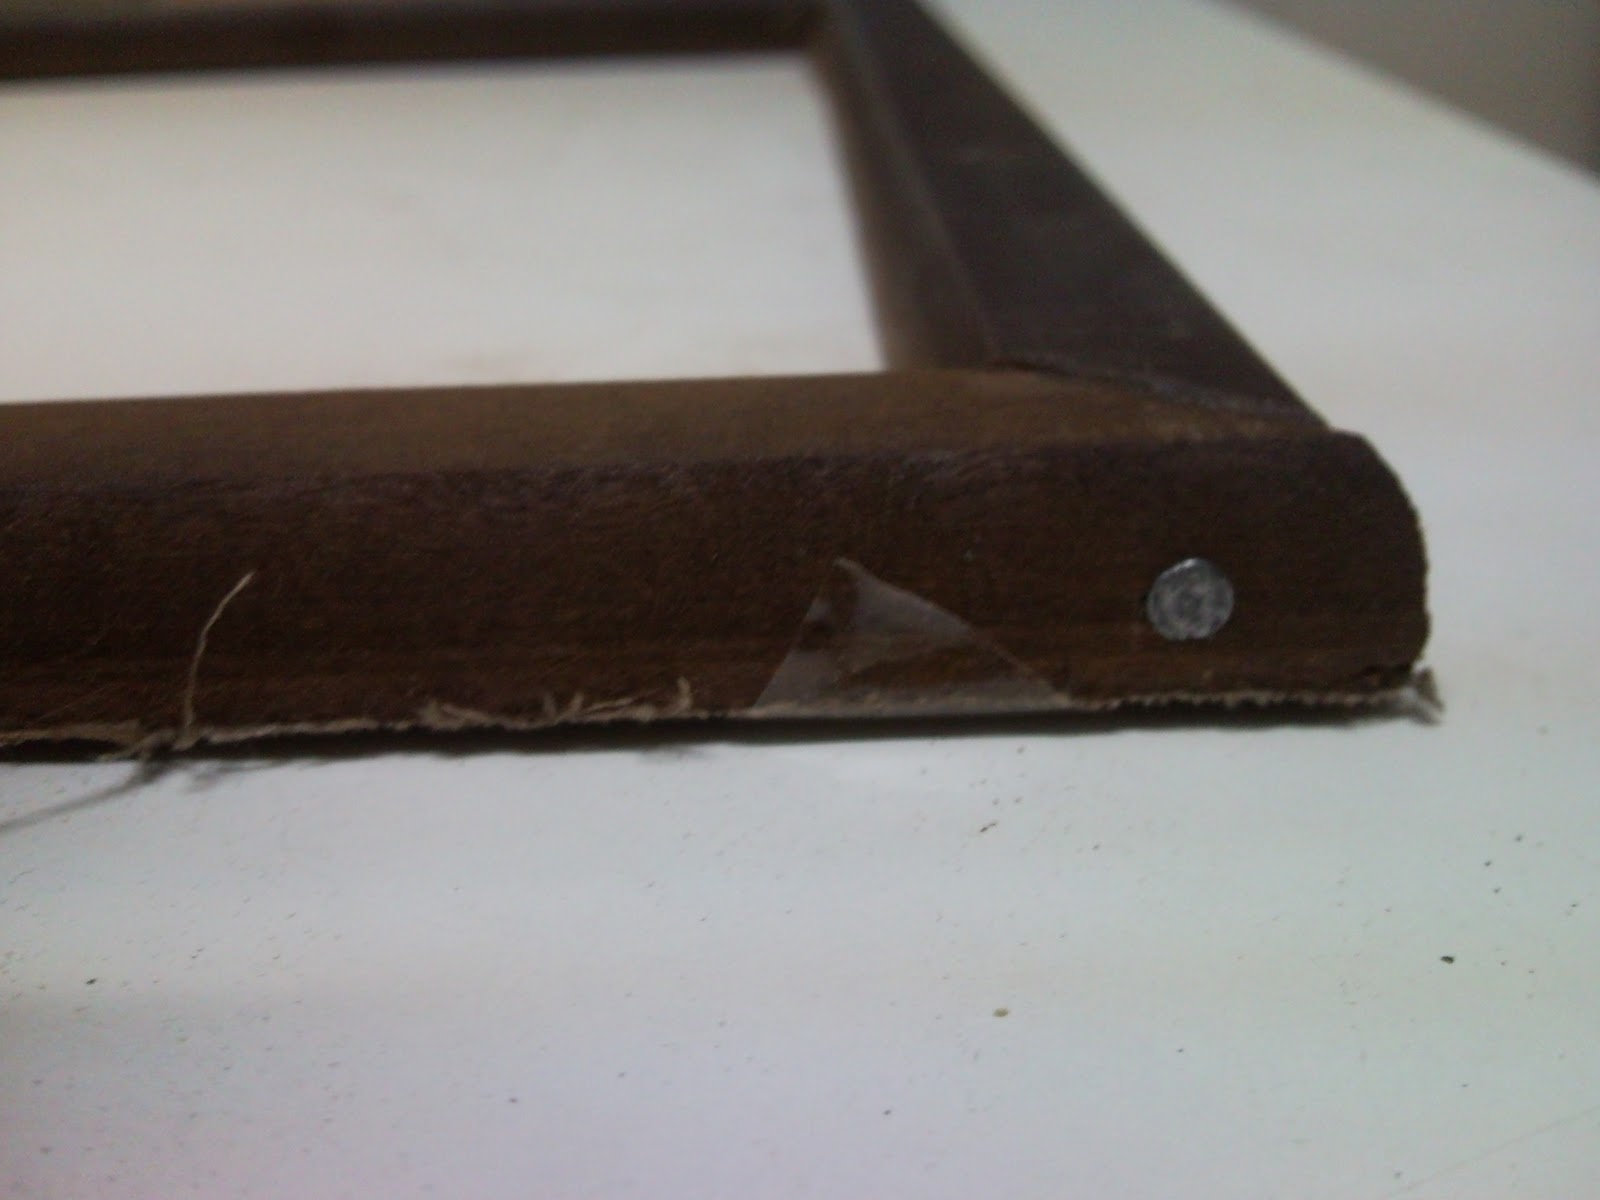
Ok! The table is assembled! But, I’m used to say to you that you can do some finishing on the products that I show here, in a way to obtain a better aesthetic; but I never to it to show. This time I decided to do it; I made a finishing with resin and paint. Here is how it looks:
Pronto, a mesa está montada. Agora, eu sempre falo que pode ser dado acabamento nos produtos que coloco aqui, no fim de obter um visual menos parecido com sucata, porém nunca faço isso para exemplificar. Desta vez resolvi fazê-lo, fiz um acabamento com resina e tinta para ficar mais harmonioso, vejam o resultado:


Hope you enjoyed!
Espero que tenham gostado!
Just to remember: If you have any doubt or something to ask about any project that I show here, just leave your comment or send me an email viraroque@gmail.com
And if you have some project that you made, send me with pictures and the “step by step” that I post it here!
Lembrando que se você tiver alguma dúvida ou questão a respeito de qualquer projeto, é só deixar no comentário ou enviar um email para viraroque@gmail.com
Se você tiver um projeto que você fez, me mande com fotos e a explicação do passo a passo que eu o colocarei aqui!
Thanks!
Obrigado!
Project by/Projeto por Nicholas B. Torretta
8 comments:
Nich, eu gostei MUITO!
ficou lindo e super util!
parabéns!!
bjoss
Adorei, mas tenho dó das raquetes! hehehe
bjinhos
Nicholas, parabéns!!! Ficou profissional! Bjo
Que máximo, Nicholas.
Profissa mesmooo!!!
Quero ser assim criativa tb qdo eu crescer. =p
Patrícia Lima likes this.
mt bom! qualquer clube de tênis deveria ter. ficou de mt bom gosto.
Nich!!!! Demorou mas finalmente vi o processo da sua tão comentada mesinha de raquetes! E devo dizer que se não superou as minhas expectativas - que já eram bem altas - pelo menos correspondeu a elas! Ou que talvez nem tivesse expectativas, além de que seria um projeto muito bom, o que de fato é...
Está de parabéns amigo, mas isso não precisa nem dizer né! Deu vontade de fazer uma mesinha dessas pra mim, qualquer dia eu tento! Adorei!
Beijos!
*:
Love thiss
Post a Comment