Páginas

Jan 25, 2013

Incense holder from spoon/ porta incenso de colher


Hello! Happy new year! To start the year with good vibrations and good atmosphere, here is a very simple project to perfume your house! An simple incense holder made from a broken spoon and a small piece of wood.
Olá! Feliz ano novo! Para começar o ano com boas vibrações e boa atmosfera, aqui vai um projeto bem simples para perfurmar os novos ares! Um simples apoio para incensos feito a partir de uma colher e um pedaço de madeira.


All you need is: a broken spoon - this one had a plastic cable, which broke, leaving this perfect piece for our incense holder; pliers; superglue; a drilling machine with 2mm drill bit; a piece of wood (which can be substituted by washers, or any other thing you may find to make a support for the spoon)
Tudo o que você precisa é: uma colher quebrada- esta tinha um cabo de plastico que quebrou, deixando esta peça perfeita pro nosso incensário; alicate, cola superbonder, furadeira com broca de 2mm para metal, um pedaço de madeira (que pode ser substituido por arruelas ou qualquer outra coisa que você achar que sirva como base para a colher)


First you need to bend the spoon, with the pliers, so that the role at the end of it stays on top, this hole is where the incense stick will be supported.

Primeiro você precisa entortar a colher com o alicate de forma que o buraco na ponta da peça fique para cima, este buraco é onde o incenso ficará apoiado.


After that, mark where the end of the incense touches the spoon in a way that the higher part of the incense does not goes out from the spoon - so that the ashes falls on the spoon. For marking you can use the tip of a screw driver or any other sharp object. Be careful!
Feito isso, marque onde a base do incenso toca a colher, de forma que a ponta superior do incenso não fique para fora da mesma, desta forma as cinzas não cairão para fora da colher. Para marcar você pode usar uma chave de fenta ou qualquer outro objeto pontiagudo. Tenha cuidado


Now, in that little mark you made, use the drilling machine to deepen the mark. Note that you don't need to go through the metal, but just to make a small cavity to keep the incense stable.

Agora, na pequena marca que você fez, use a furadeira para afunda-la. Não é preciso atravessar a colher, mas só criar uma depressão para que o incenso fique estável.


After this is done, since the spoon is not really stable, let's go for the base. You can use whatever suits you. I found this piece of wood and decided to shape it a little bit to fit the spoon. 
Após isso, visto que a colher não é o objeto mais estável pra essa situação, e não queremos cinzas por todas as partes, vamos para a base. Eu achei este pedaço de madeira e resolvi modela-lo um pouco para acomodar a colher.


For that I widened the hole on top so that the spoon can stay more balanced there and so that there is more area for gluing it.  


Para isso eu abri o buraco em cima para ter mais area de contato e mais area para cola.


You can make whatever finishing you want, here I made some plain, "diamond", sanding and died it with a rosewood paint. 

Você pode fazer o acabamento que quiser, aqui eu resolvi dar umas lixadas retas, como um "diamante" e depois tingi com tintura avermelhada para madeira. 


For last but not least, put the superglue on the edge of the hole you made on the base and place the spoon there. Wait for it to dry, and it is ready! Easy as pie!


Por último e não menos importante, passe super bonder na quina do furo e posicione a colher. Espere secar e está pronto! Fácil!


Then you can to some drawings or whatever you feel like. I decided to draw the edges of the surfaces I sanded. Here it is:
Então você pode fazer o acabamento que quiser. Eu decidi contornar as faces que havia lixado. Aqui está:


Hope you liked it! 
Espero que tenham gostado!


Thank you!
Obrigado!


Project by/projeto por Nicholas Torretta

Nov 6, 2012

WDC Megapolis Workshop


Hello again!
Sorry for the delay, we've spent some time collecting the pictures, but now that we have them all, we can show you the result of the workshop!
This one, also for WDC 2012, again with a very nice partnership with the NGO Dodo, happened in their 7th edition of the yearly "Megapolis" event. This time it was in Kiasma Museum in Helsinki on the 6th of October. 

Olá, mais uma vez!
Gostaríamos de nos desculpar pelo atraso, gastamos algum tempo para conseguir reunir todas as fotos, mas agora que as temos, podemos mostrar o resultado do nosso workshop!
Desta vez, também para o WDC (World Design Capital) 2012 e com a ótima parceria com a NGO Dodo, aconteceu na 7ª edição do evento anual "Megapolis". O workshop ocorreu no Museu Kiasma em Helsink-Finlândia no dia 6 de Outubro.


The Megapolis event is an Dodo's project which consists in a day full of lectures, debates and side events (workshops) about the city of the future, this year's theme was "Makers in the city", therefore, about active citizens.
O evento Megapolis é um projeto criado pela Dodo que consiste em um dia de palestras, debates e eventos paralelos (workshops) sobre as cidades do futuro. Este ano o tema foi "Makers in the city", traduzindo, algo como "fazedores na cidade", logo, sobre cidadãos ativos.


There, VOQ was: Nicholas Torreta (Designer - Brazil) together with Anja-Lisa Hirscher (Designer - Germany), Kätlin Kangur (Designer - Estonia) and Vendula Jahanová (Psychologist - Czech Republic). We focused on the future makers: children! 
O VOQ foi composto por: Nicholas Torreta (Designer - Brasil) junto com Anja-Lisa Hirscher (Designer - Alemanha), Kätlin Kangur (Designer - Estonia) e Vendula Jahanová (Psicóloga - República Checa). Focamos o workshop nos criadores do futuro: as crianças!

It was an non-stop open workshop where children could join and do many different tasks. But let's not reveal everything right now, so, take a look at the pictures and you will see all the playful things that the little ones made there!
Fizemos um workshop aberto, sem intervalos, onde as crianças poderiam participar e realizar diferentes tarefas. Mas não vamos revelar tudo o que aconteceu agora, então, dê uma olhada nas fotos abaixo e você vai poder conferir as coisas  divertidas que os pequenos fizeram por lá!
Here we go!
Vamos lá!


"Draw the new city"! In this big canvas children took her time to draw how is the city they would like to live in.
"Desenhe a nova cidade"! Nessa grande tela, as crianças levaram o tempo necessário para  desenhar a cidade que elas gostariam de viver.


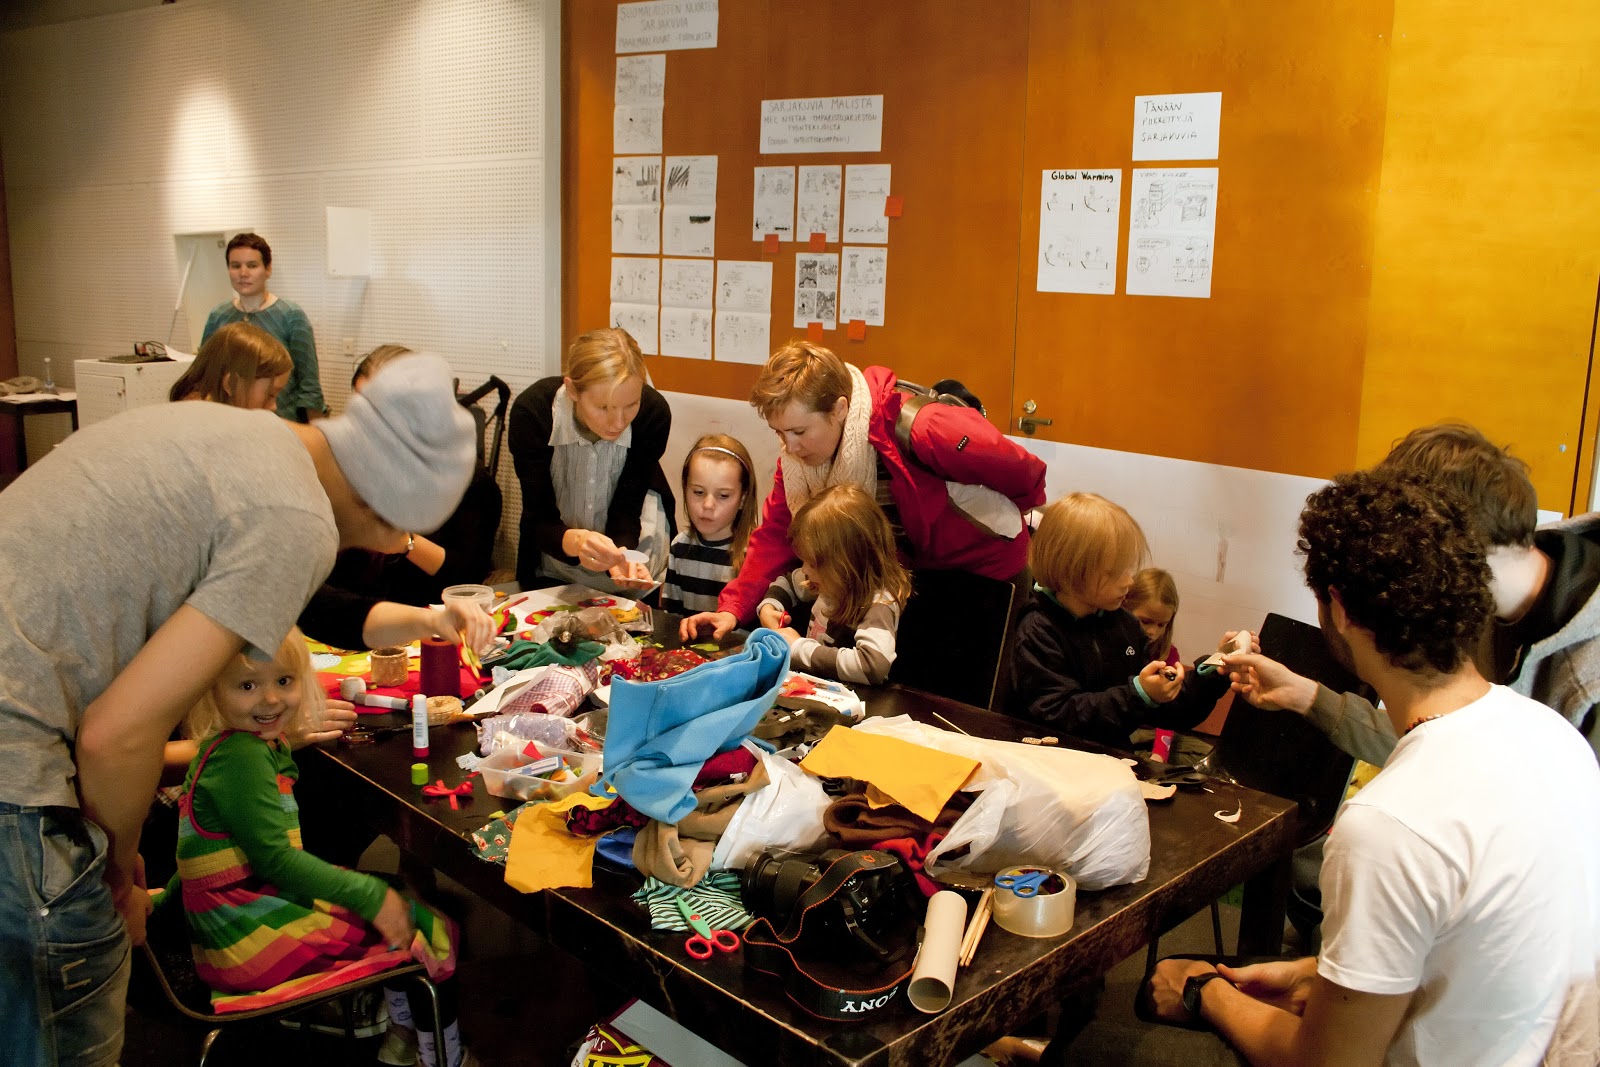
Felt batches and decorative fashion!
Colors, fun and concentration! An open opportunity for creativity!

Tecidos e moda decorativa!
Cores, diversão e concentração! Uma oportunidade para a criatividade!


Cardboard cars! 
Easy and fun! Be an car builder for a while and then....
Carros de papelão!
Fácil e divertido! Seja um construtor de carros por um tempo e então...


Vruuuuuuuuuumm!, make some noise and have fun!
Vruuuuuuuuumm! Faça o barulho e se divirta!


And here are some pictures where you can see everything going on at the same time! 4 hours of lots of fun and making!
A seguir, algumas imagens onde você pode ver como tudo aconteceu ao mesmo tempo! 4 horas de muita diversão, criação e "fazer"!


Hope you enjoyed!
Now, go out and play!
Thanks everybody who helped, participated and, of course, for all of you who supports us and is reading this right now! 
See you soon! 
Espero que tenham gostado!
Agora, é sua fez de criar e brincar!
Obrigado a todos que ajudaram, participara e, claro, a todos vocês que nos apoiam e estão lendo neste momento. 
Até mais!

Bye bye!
Now, go out and play!
Tchau, tchau!
Agora é a sua vez, vá se divertir!

Oct 3, 2012

Megapolis 2027 - workshop


Here we are again! This Saturday, the Dodo NGO (dodo.org) is organizing the 7th Megapolis event, an event which is focused on planing the city o future, also  part of the Word Design Capital programme. And this year the main theme is "The city of Makers". Therefore, about active and activating people in the city. There will be many diferent lectures from 13pm to 16pm in Kiasma Museum (mostly in Finnish). check the program in the Facebook event here:
Aqui estamos de novo! Este Sábado, a ONG DODO (dodo.org) está organizando o 7o MEgapolis, um evento que tem como intuito pensar em como será a cidade do futuro. O tema deste ano é "Cidade dos fazedores", ou seja sobre cidadões ativos e sobre ativar pessoas na cidade. Terão varias palestras iniciando às 13:00 até às 16:00 no museu Kiasma (a maioria das palestras serão em Finlandês). Veja o programa no evento do face book aqui:

https://www.facebook.com/events/278810568896815/


And at the same time, we will be doing the "side events" of the program. Together with the designers Anja-Lisa Hirscher (Germany), Kätlin Kangur (Estonia) and Dodo's volunteers we will be holding different activities for the future makers of the city: children!
Durante o evento, estaremos organizando os "acontecimentos paralelos". Em parceria com as designers Anja Lisa Hischer (Alemanhã), Kätlin Kangur (Estônia) e volutarios da ONG Dodo estaremos fazendo diversas atividades para os "fazedores" do futuro: crian
ças!


You can check the programm here:
Você pode ver o programa aqui:

https://www.facebook.com/events/285182798255170/


Hope to see you and your kids there!
Esperamos você e seus filhos lá!

Bye bye!

Até logo!

Sep 17, 2012

WDC Workshop


Hello!
Olá

So, as you may know, we just had the workshop at the World Design Capital event in Helsinki - Finland on the 9th of September. Now Let's see a bit of what happened there!

Como vocês devem saber, acabamos de fazer o workshop no evento Capital Mundial do Design em Helsinki - Finlândia no último dia 9. Agora vamos ver um pouco do que aconteceu por lá!

With a group of ten designers, each one from a different corner of the Earth (Estonia, India, Germany, Canada, South Korea, Iran, Colombia and of course, Brazil), we started the workshop by doing some activities and discussions on issues such as the status quo of design, consumerism, sustainability and vernacular design  among other issues that were brought up during the conversation. Unfortunately we have no pictures of this part of the workshop, but it will appear in a video that is being edited by our colleague H. Pakbeen. Therefore, soon you will be able to see a bit of "moving action"!
Com um grupo de dez designers, cada um de um canto do mundo (Estônia, India, Alemanha, Canadá, Coréia do Sul, Irã, Colombia e claro, Brasil), começamos o workshop com uma atividades e discussões sobre as temáticas do status quo do design, consumismo, sustentabilidade e design vernacular, entre outros assuntos que foram trazidos durante a conversa. Infelizmente não temos fotos desta etapa, porém ela aparecerá em um video que esta sendo editado por nosso colega H. Pakbeen sobre o workshop. Portanto, aguardem para ver um pouco da ação em movimento!

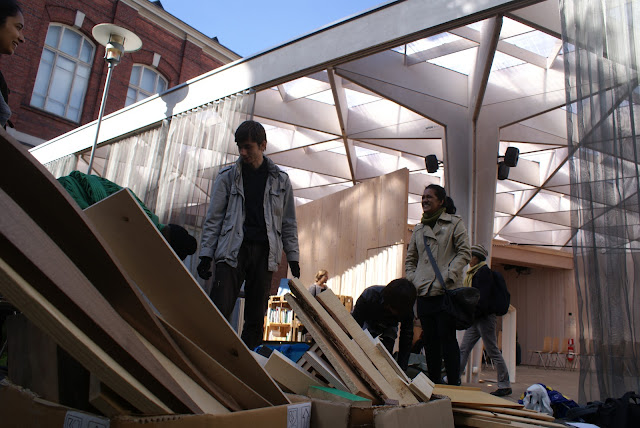
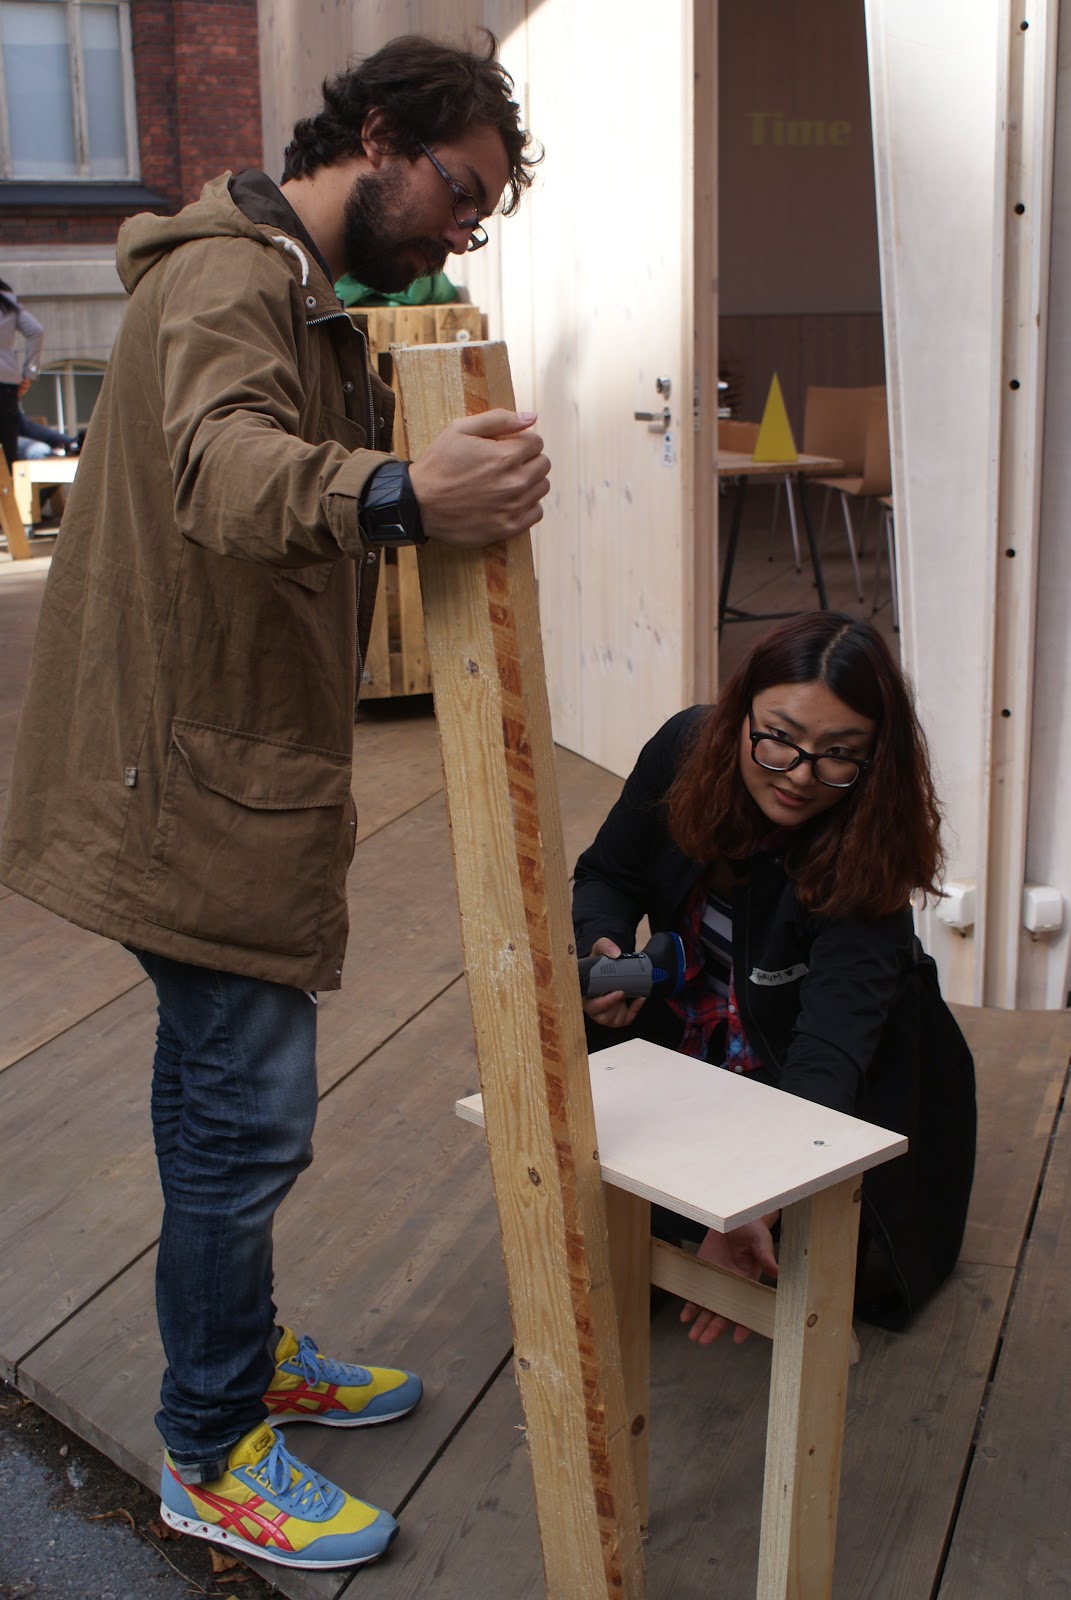
Well, back to the process, after some discussion and exercises to raise awareness about the importance of objects in our everyday live, we went for the "hands on" part of the workshop. The group was splited into two teams, and, from a pile os scraps, they had to build chairs with the record time of two hours!
Bom, voltando ao processo, após a discussão e alguns exercícios de conscientização sobre a importância dos objetos em nosso cotidiano, partimos para o "mãos na massa", onde o grupo se dividiu em duas equipes, e, no meio da pilha de sucata, tiveram que desenvolver cadeiras em tempo recorde de 2 horas!


This was the beginning: the groups exploring the material, to get to know the pieces and its possibilities. It was a deep dive in the junk!
Isso foi o começo: os grupos explorando o material, pra conhecer as peças e suas possibilidades. Foi um mergulho profundo na sucata!
Explorations and experimentation!! Sometimes it works, sometimes not, but the important thing is to experiment, find out what the material can  and can not do. Building is very different from drawing, because as they say, "the paper accepts everything" but the materia ... That is why during this production phase the groups could not draw, but, instead, make!
Explorações e experimentações! Às vezes dá certo, às vezes não, mas o importante é experimentar, é descobrir o que o material aceita e o que não. Construir é muito diferente de desenhar, pois como dizem, "o papel aceita tudo", já a materia... É por isso que durante a produção os grupos não puderam desenhar, mas sim fazer.

Ideas taking shape!
Ideias tomando forma!

The first group begins to get close to a chair!
O primeiro grupo começa a chegar perto de uma cadeira!
The second group is not behind and is also successful at building their chair!
O segundo grupo não fica atrás e também tem sucesso construindo a sua! 
Most important: teamwork! Everyone together for a common goal.
O mais importante: trabalho em equipe! Todos juntos para um mesmo objetivo.

Named as "the Knowledge chair", the first chair is ready! Notice how they solved the comfort issue in the headrest!
Apelidada de "cadeira do conhecimento", a primeira cadeira fica pronta! Vejam que interessante como resolveram o problema de conforto no apoio da cabeça!
The workshop drew attention of who was around! Time for a photo shoot for the group of tourists that surrounded the workshop!
E o workshop chamou atenção de quem estava por perto! Hora para uma sessão de fotos para os grupo de turistas que rodearam o workshop! 


And is the result! But wasn't there only two groups?! Yes! But the participants got excited about the idea and started making chairs with everything!
E aqui a somatória dos resultados! E olhem só! não eram só dois grupos? É o pessoal se empolgou com a ideia e começaram a fazer cadeiras com tudo que era possível! 


See the details of each chair:
Vejam os detalhes de cada uma:


Anja's "mushroom chair"! Simple and usefull! Resembles the milking stools, doesn't it?
A "cadeira cogumelo" de Anja! Simples e eficaz! Lembra muito os banquinhos de ordenhar, não? 
The "Chair box" by Hessam! But is it only a box?
A "Cadeira caixa" de Hessam! Mas é somente uma caixa?
No! Look how nicely he created a structure inside to make "the world's strongest cardboard box"!
 Não! vejam só que legal a estrutura feita por dentro, para criar a caixa de papelão "mais forte do mundo"! 
The "knowledge chair" posing with all its wisdom.
A "cadeira do conhecimento" posando com todo seu saber. 
Here the chair of the second group, named "rocking chair - redefined"! But why this name? Because the "rocking" is on the backrest! and laterally! It is very effective to lull babies!
Aqui a cadeira do segundo grupo, apelidada de "cadeira de balanço - a reinvenção". Porque esse nome? porque o balanço dela está no encosto! e lateralmente! Foi comprovada a sua eficácia para ninar bebês!
The "wannabe a chair", that I tried to make, but time was too short.
A "eu quero ser uma cadeira", que tentei fazer, mas o tempo foi curto.
And the fun "poney chair" by June! Works as chair and as a toy! Kids will love!
E a divertida "cadeira poney" da June! Serve como cadeira e como brinquedo! A crianças vão adorar! 
Some of the participants had to leave before the end of the workshop, but, for those who stayed , here is a photo of the group that participated in this vary creative experience that we had!
Alguns tiveram que partir antes do encerramento do workshop, mas para aqueles que ficaram, eis aqui a foto do grupo participante dessa experiência super criativa que tivemos!


To see more photos of the workshop, please visit our Facebook page: facebook.com/viraroque
Para ver mais fotos do processo, acesse nossa página do Facebook: facebook.com/viraroque

Before saying goodbye, I want to thank everyone who participated in the event, the Dodo NGO, Aalto University, and the entire WDC team who made this workshop come true! Thank you!
Antes de me despedir, quero agradecer muito a todos que participaram do evento, à ong Dodo, à Aalto University, e à toda equipe do projeto WDC que fizeram esse workhop se realizar! Muito obrigado!

See you soon with more projects, and, the video about the workshop (it may take a while)! 
Now VOQ cames with full power!
Até a proxima com mais projetos e, em breve, teremos o vídeo sobre o workshop! Aguardem! Agora o VOQ vem a todo vapor!

Bye bye!
Tchau tchau!

Sep 8, 2012

Workshop tomorrow! amanhã!!!


The World Design Capital Workshop is tomorrow! 
Hope to se you all at the Pavilion, at 11 am!

For those who can't come, we will publish the results here in a couple of days!


--
O workshop na Capital Mundial do Desigh é amanhã! Para os que não poderão comparecer, publicaremos o resultado aqui no blog dentro de alguns dias!

Aug 22, 2012

Napkin holder from CD/DVD - Porta guardanapos de CD/DVD


Hello, VOQers!
Olá, VOQers!

Yes, it seems that we have no shame! It has been a long time since we last uploaded a project here! And we even had complains about our delay! no coments....
É, parece que não tomamos vergonha na cara, mesmo! Já faz um bom tempo que não aparecemos por aqui e postamos um novo projeto e já tivemos até reclamações. Sem palavras.

Nevertheless, as an attempt to redeem us from our long time without projects, here we are with another eccentric invention that we, full or courage, dare to call as a design object! Well, apart from any jokes, today we will make a very simple project, one which uses very little material and is also very simple to build: a napkin holder from a CD/DVD
Mas na tentativa de nos redimir (sempre), aqui estamos com mais outra de nossas excêntricas invenções, que temos coragem de chamar de "peças de design". Bom, brincadeiras a parte, hoje desenvolvemos um projeto muito simples, utilizando quase nada de materiais e de execução bem rápida: Trata-se de um porta-guardanapos feito com CD/DVD.


Ready? Let's go ...
Preparados? Mãos a obra...


Bill of Materials: 1 sheet of paper, 1 instant adhesive, pencil, eraser, ruler and a cutter with a sharp blade.
Lista de materiais: 1 folha de papel em branco, 1 cola instantânea, lápis, borracha, régua e estilete com lâmina bem afiada.


We start by drawing a 12cm square on the paper. on this square we draw two lines with 2,4cm distance between them, just as seen in the picture. This will be our cutting template.
Iniciamos desenhando na folha de papel um quadrado de 12 cm de lado, e dois riscos centralizados com uma distância de 2,4 cm entre eles, assim como vemos na imagem ao lado. Este será o nosso gabarito.
Then we place the disc on top of the template, centralizing it in the square. After that we draw on the disc the two lines that we had on the template.
Em seguida, colocamos o disco em cima do gabarito, acomodando-o de forma centralizada, para que fique dentro do quadrado. Marcamos nele com o lápis, os dois riscos centrais.
After marking it cut the disc exactly on the marks, with the cutter. You may use the back of a ruller do guide the cutter through the line. Jus as seen on the picture
Feito os riscos, o disco deverá ser cortado com o estilete exatamente nestas mesmas marcações. Para servir de guia para o estilete e proteger sua mão, utilize as costas (parte mais alta) da régua, assim como está no exemplo ao lado.
 With the disc cut into three parts sand its ends with 120 sandpaper, to make the surface more smooth and well finished.
Com o disco cortado em três partes, lixe suas extremidades com lixa d'água 120, para deixar a superfície mais bem acabada e lisa.
Finally, apply the adhesive on the edges of the pieces, glueing the sides on top of the central piece, which will then become the base of the napkin holder.
Por fim aplique a cola instantânea nas extremidades das peças, colando as laterais do disco por cima da peça central. Esta servirá de base para o porta-guardanapos. 

Now just wait for the glue to get dry and "voila"! You have a brand new napkin holder to renew your dining toold. I chose this blue whit white and orange details CD because it would match with my set of turquoise and yellow table cloths. The interesting thing is that I ended by not using more material to give new "finishing" to the piece because it was "almost" ready.
Agora basta aguardar a secagem e pronto! Temos um novíssimo porta-guardanapos para deixar sua mesa de jantar inusitada e renovada. Eu escolhi este CD azul com detalhes em branco e laranja, pois ele poderia ser uma ótima combinação com o meu jogo de jantar azul turquesa e sousplats amarelos. O interessante é que acabei por não utilizar de mais material para dar novo acabamento a peça, pois ela já estava "quase" pronta.


And ou can do the same, since the project can be done as you prefer, only depending on your creativity and imagination.
E você poderá fazer o mesmo, uma vez que este projeto pode ser feito da forma que desejar, dependendo apenas de sua criatividade e disponibilidade para faze-lo.


See you soon!
Até breve!


Project by/Projeto por: Marcelo Barros