Páginas

Nov 25, 2011

New VOQ - novo VOQ

Hello!
Oi!

Well, it has been a long time since the last post....
But there is a reason for it! Virar o quê changed! Now it has a nickname, "VOQ"! Do you think that is all?! No! now VOQ is growing! It became a team! Now we are three designers, and we hope to provide you even better ideas and projects!
As it is said: “two heads thinks better than one”, now imagine three! So first of all let me tell you a little bit of how this change happened and introduce you all the VOQ members:

Bom, faz muito tempo desde o último post aqui.....
Mas há uma razão pra isso! O Virar o quê mudou! Agora tem um apelido, "VOQ"! Mas você acha que isso é tudo? Não!? Agora o VOQ está crescendo! E virou uma equipe! Agora somos três designers, e esperamos criar projetos e ideias ainda melhores! Como dizem "duas cabecas pensam melhor do que uma", agora imaginem três!


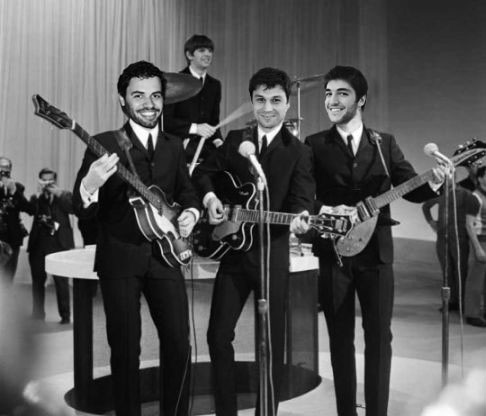
What those images means?!!!!!!
O que são essas imagens??????!!!!


They are flashes from our past... whant to know more? Stay tunned for the next post with the history behind the VOQ's members!
Elas são imagens de nossos passados.... quer saber mais? Fique ligado no próximo post onde revelaremos a história por trás dos membros do VOQ!


Now we will have about three publishments every month (one from each member) and we will restart the Workshops projects! for more informtion about workshops, send us an email viraroque@gmail.com


Agora teremos cerca de três posts por mês (um de cada membro) e retomaremos o projeto dos Workshops! 
Para mais informacões sobre workshops, mande um email para viraroque@gmail.com


Besides that now we have a facebook page! There, you you get the notifications of the new posts here and further more, we will use that space to publish links to many different examples of ecodesign, sustainable design, upcicling, etc. where you can also publish the ones you find/create! So just click on the "like" button over there and became a part of VOQ on Facebook!---->

Fora isso, agora temos uma página no facebook! Lá você será atualizado a cada novo post aqui no blog e, ainda mais, é um espaco para colocarmos exemplos e ideias sobre ecodesign, design sustentável  reutilizacão e etc. onde você também pode compartilhar os exemplos que você achou/criou! Só o que tem que fazer é clicar no botão "Curtir" ali do lado---->


1, 2, 3, Go!!!!! Let's start it!
Thank you! Hope you like the news and that you will like even more the new VOQ!

1, 2, 3 e já!!! Vamos comecar!
Muito obrigado! Espero que você tenha gostado das noticias e que goste ainda mais do novo VOQ!!


See you soon!
Até logo!


VOQ team

Aug 31, 2011

key holder from a fork - pedurador de chaves com um garfo


Hello! Sorry about the huge gap between the last post and this one. But I have a reason, I just moved to Helsinki-Finland to do my Master degree at Aalto University (Creative Sustainability). Therefore I´m starting to know the city and I still don´t have any tools nor place to develop new projects (but I hope to solve this problem as soon as possible!).
Olá! Desculpe pela enorme distância entre este post e o anterior. Mas eu tenho um motivo: Eu acabei de me mudar pra Helsinki-Finlândia para fazer um Mestrado na Aalto University (Sustentablidade Criativa). Por isso estou apenas comecando a cohecer a cidade e ainda não tenho ferramentas nem lugar para executar novos projetos (mas espero que consiga resolver esse probleminha logo!).

Another new, is that the blog will pass through a big (and very good) change, but this is subject for a next post, so, keep tuned!
Outra notícia é que o blog passará por uma grande (e muito boa mudanca), mas isso é asunto pro próximo post, portanto, fiquem ligados!

Well, today´s project is very simple, it is a project that I developed in Brazil just before moving to Finland. It is a key holder made from a fork.
Bom, o projeto de hoje é super simples, é um projetinho que eu fiz ainda no Brasil um pouco antes de me mudar pra cá, é um suporte para chaves feito a partir de um garfo.


The materials are: a old fork, pliers, and a sandpaper.

Os materiais são: um garfo velho, alicate e lixa.


Just fold the fork´s teeth in a way that they get a little bit far from each other, so that you have enough space to hang your keys.

Com o alicate entorte os "dentes" do garfo de modo que eles fiquem um tano quanto longe um do outro para que você tenha espaco suficiente para pendurar chaves. 


Then, for safety reasons, sand the fork.

Então, por questões de seguranca, lixe o garfo.


And now all you need is to place it on a wall; here I used  a strong double-sided tape, but you can drill a hole on the fork and hang it in a screw, whatever you thing its better!

Agora só falta você perdurá-lo em uma parede. Aqui eu usei uma fita dupla-face bem forte, mas você pode também fazer um furo no garfo e perdurar com um parafuso ou como preferir!


(Sorry about the terrible quality of the pictures)  
(Desculpe pela horrível qualidade das fotos)

Thanks!
Obrigado!

Project by/ Projeto por Nicholas B. Torretta


Aug 2, 2011

Second class of the workshop - segunda aula do workshop

Hello!
Oi!

Today I’ll show you how was the second class of the workshop at SESC.
Hoje vamos mostrar como foi a segunda aula do workshop no SESC.


Well, in the first class (previous post) the aim was to show to the students that they are able to create and transform their “universe” with simple tool and materials. Therefore, to continue increasing their knowledge in this way, the second class was about exploring and, therefore, discovering the proprieties of different materials.

Bom, na primeira aula (post anterior) o foco era que os alunos se descobrissem capazes de construir modificar seu próprio universo usando ferramentas e materiais de fácil acesso. Então, para continuar nesta linha, a segunda aula foi sobre materiais, para que eles, através da exploração, descobrissem as diferentes propriedades de cada material.

So, the proposal was to create a lampshade, which consisted in a structure and a cover, using various kinds of papers.
Para isso, a proposta foi de criar uma cúpula para um abajur (estrutura e revestimento) usando diferentes tipos de papéis.

We started with some group dynamics to incentive their creativity.
Começamos com algumas dinâmicas de grupo para incentivo de criatividade.


After that, in groups, they started to explore the materials and to try to build a structure (this had to be taller than 30cm).
Após isso, in grupos, os alunos começaram a explorar os materiais e tentar construir a estrutura (que tinha que ter mais de 30cm de altura).


Each group found their way to accomplish the challenge with colorful ideas!
Cada grupo foi encontrando uma solução com ideias cada vez mais coloridas!


As the aim of the workshop wasn’t to have perfect final products, but to gain knowledge during the experience, we did a little conversation after manufacturing the products, where the students told us what they’ve learned and what they could have done in a different way to achieve a better result.
Como o foco do workshop não era em ter um produto final perfeito, e sim no conhecimento adquirido durante o processo, nós fizemos uma pequena discussão após a construção onde os alunos puderam dizer o que tinham aprendido e nos contar de que outra forma eles poderiam ter feito o produto para obter resultados melhores.

After that we did some groups dynamics about communication ant team work.
Após isso fizemos algumas dinâmicas de grupo para tratar sobre comunicação e trabalho em equipe.


To complete the course, we were going to have a third class where we would explore the relationship between product and the human body, therefore creating a knowledge line that would start “wow! I can build things!”, passing to “Learning how to explore and adapt the materials that I have” and finishing with “The product and myself”. But, unfortunately, the students couldn’t go to the final class. But anyway, they could learn new things and know different ways to deals with the “trash”.
Para completar o curso, nos teríamos uma terceira aula na qual os alunos iriam explorar as relações dos produtos com o corpo humano. Criando assim uma linha de aprendizado que começou com “Olha! Eu posso construir minhas coisas!”, passando por “Aprendendo a explorar e adaptar os materiais que tenho disponível” e terminando com “O produto e eu”. Mas, infelizmente, os alunos não puderam comparecer à terceira aula. Mas mesmo assim conseguiram aprender novas coisas e criar novos olhares para o “lixo”.


I like to thank the Mundaréu NGO, the all the SESC team (specially the trainees Germem and Fúlvia, who helped me during the classes), and for the São Camilo Shelter, for the students.
Thank you very much!


Eu quero agradecer a toda equipe da Mundaréu, a toda equipe do SESC (especialmente aos estagiários Germem e Fúlvia, que me acompanharam nas aulas) e ao abrigo São Camilo pelos alunos!
Muito obrigado!

(For more information about the dynamic, pedagogical methodology and so on, contact me at viraroque@gmail.com)
(Para mais informações sobre as dinâmicas, a metodologia pedagógica  etc, me contate pela viraroque@gmail.com)

Project by/projeto por Nicholas B. Torretta

Jun 30, 2011

First class of the workshop - primeira aula do workshop

Hello!
Oi!

After a long time, I’m back!
Depois de muito tempo, estou de volta!

Sorry about the big gap between the last publication and this, but I have a reason, that will bring some changes to this blog.
I was accepted to a Master degree in Design at Aalto University, in Helsinki – Finland; therefore I have been busy with the preparations (visa and so on). But this is a subject for another post (stay tuned, there are going to happen some nice changes here)

Desculpe pelo enorme tempo entre a última postagem e esta, mas eu tenho um motivo, que trará boas mudanças para este blog.
Eu fui aceito para um mestrado na Aalto University, em Helsinki – Finlândia; portanto eu tenho estado muito ocupado com os preparativos (Visto e etc.). Mas esse é assunto para um próximo post (fique ligado para saber as boas mudanças que ocorrerão aqui).

Ok, today’s post: The workshop at SESC with Mundaréu. We had a lot of complications during the process that, unfortunately, led us to a shorter workshop, with only three classes. So here is the first one:

Bom, o post de hoje: O workshop no SESC com a Mundaréu. Tivemos muitos imprevistos e problemas que nos levaram a fazer um workshop somente de três aulas. Então aqui vai sobre a primeira:

The first class, with children and teenagers from the São Camilo Shelter, had as the subject-verb “to support” and the idea was to present Design to the student trough an intensive and interactive way, without judgments and preconceptions; showing them that they can create their own things and just using discarded materials. Therefore, the aim was not to have a wonderful final product but to gain knowledge with the process.

A primeira aula, com crianças e adolescentes do Abrigo Beneficente São Camilo, teve como tema-verbo “apoiar” e a ideia era de apresentar-lhes o design de uma maneira interativa e intensiva, livre de julgamentos e preconceitos; mostrando a eles que eles podem criar seus próprios objetos e utilizando somente materiais descartados.  Assim, o foco não era de ter um produto final bom, mas sim de conseguir o conhecimento durante o processo.

We started with a group dynamic so that they could feel the importance (by the lack of) of the products that we deal everyday in our life.

Nós começamos com uma dinâmica de grupo, para que eles pudessem sentir a importância (e a falta) que tem os objetos que lidamos diariamente. 

(For more information about the dynamic, pedagogical methodology and so on, contact me at viraroque@gmail.com)
(Para mais informações sobre as dinâmicas, a metodologia pedagógica  etc, me contate pela viraroque@gmail.com)

After that we had a little conversation about the products, art and design.
Depois disso fizemos um bate-papo sobre produtos, arte e design.


After that: “hands on” time!
E depois, claro: mãos na massa!

In groups, the students started to search the materials to build their own “supporting” product!
Em grupos, os alunos começaram a pesquisar os materiais para construir um “objeto de apoiar”.


They created a seat, a center table and a basket to hold magazines.
Eles criaram um banquinho, uma mesa de centro e um cesto pra guardar revistas.


Did you see how similar is the seat thay they created and the one that the students from FAAP University created?!??!!

Você reparou na semelhança entre o banquinho que eles construiram e o que foi construidos pelos alunos da FAAP?

So, for today, that’s it!
Por hoje é isso!


Hope you enjoyed!
Espero que tenha gostado!

Next week we have the result from the second class!
Semana que vem tem o resultado da segunda aula!

Thanks!
Obrigado!

Workshop by Nicholas B. Torretta at SESC Ipiranga trough Mundaréu Assoc.
Workshop por Nicholas B. Torretta no SESC Ipiranga pela Assoc. Mundaréu.


Apr 26, 2011

Workshop - 5 classes - starting Friday


Postponed to May 6th!
Adiado para o dia 6 de maio!

Hello!
Today I want to tell you about my next Workshop.

Olá!
Hoje eu quero avisá-los sobre meu próximo workshop.

In a partnership with Mundaréu Association, we are going to give a 5 classes Workshop at SESC (The Social Service of Commerce), at the “Ipiranga” unit.

Em parceria com a Associação Mundaréu, nos daremos um workshop de 5 aulas no SESC Ipiranga.

The workshop is free, and consists in 5 classes of 3 hours each (every Friday), where we will deal with the possibilities of used materials. We will work in an interactive way to discover the endless possibilities of the used things that we have at home, and discover how we can transform them into new thing. The aim is not to provide a “formula” of how to transform things, but to instigate creativity and the ecological concern in a way that the participants will become able to recreate their own things whenever they want or need to.

O workshop é gratuito e consiste em 5 aulas de 3 horas cada (toda sexta-feira), no qual nos abordaremos as possibilidades dos materiais usados. Nós trabalharemos de maneira interativa para descobrir as infinitas possibilidades dos objetos usados que temos em casa e então descobrir como podemos transformá-los.  A intenção não é de dar uma “receita” de como transformar os produtos, mas sim instigar a criatividade, a consciência ecológica de modo que os participantes se tornem aptos à transformar seus objetos como e quando quiserem.


We will talk about design, creativity, sustainability and, of course, we will transform a lot of things! Therefore, if you are interested, go to the SESC’s website and register for the workshop!

Nós conversaremos sobre design, criatividade, sustentabilidade e, claro, transformaremos muitas coisas! Então, se você está interessado, vá à pagina do SESC e se registre para o workshop!

I’ll publish the results of the workshop here by its end.
Ao fim do mesmo eu publicarei o resultado aqui.

Thanks!
Obrigado!

Nicholas B. Torretta

Apr 19, 2011

decorative shelf - prateleiras decorativas


Hello! New Project here!
Olá! Novo exemplo por aqui!

This week I had the visit of my good friend and awesome designer Walter “Cuco” Gonçalves Neto and we spend our time developing products with the scraps that I have at home; this is the first one that we build. A kind of shelf for decorative objects; very simple to assemble! Hope you enjoy!

Esta semana tive a visita do grande amigo e grande designer Walter “Cuco” Gonçalves Neto e aproveitamos para desenvolver alguns produtos com sucatas que eu tinha em casa, este é aqui é o primeiro que confeccionamos. Um apoio para peças decorativas muito simples de se construir! Espero que gostem!


You will need: a wood board, butter container (empty ones), wooden screws, a screw driver, and a drilling machine.

Você vai precisar de uma tabua de madeira, potes (vazios) de margarina, parafusos para madeira, arruelas, e uma chave de fenda e uma furadeira.


First step: choose the layout that you prefer. Notice that here we decided to paint two containers (which weren’t transparent) to get a better appearance.

Primeiro posicione os potes de margarina na tabua na disposição que você preferir. Repare que aqui resolvemos pintar os potes que não fossem transparentes para das um visual mais agradável.


 Now make one hole on each container (and on the wood) with a drill which must be just a little bit thinner than the screws. Make the hole in a place that will keep the container stable.

Agora faça um furo em cada pote (fure a madeira junto), com uma broca que seja um pouco menor que o parafuso. Faça o furo em um lugar que garanta que o pote fique equilibrado.


 Now just screw everything and its ready! To hang it on a wall you can make a hole on the back part of the wood.

Agora é só parafusar tudo no lugar e pronto! Para a fixação na parede você pode colocar ganchos (daqueles usados em quadros) ou simplesmente fazer um furo (que não atravesse a madeira) para encaixar o prego que estiver na parede.


That’s it! Do you like it?
É isso! O que acharam?


And remember, the products are for sale!
Lembrando que os produtos do blog estão à venda!

Send us you project: viraroque@gmail.com !
Mande seu projeto para nós: viraroque@gmail.com !


 Project by/projeto por Nicholas B. Torretta & Walter G. Neto


Apr 8, 2011

Instructables website


Hello!

Today I just want to recommend you a website that I’ve just discovered through a friend. It is the “Instructables” web site. It is a site where you can publish step-by-steps of everything, therefore, you can find hot to make thing that range from furniture, home decoration to food and so on.

I’ve been spending my time publishing the products from this blog there; therefore you will be able to see the main pictures from my projects there. But the step by step of the projects developed by me will continue here.


About new projects, I have some coming soon. A apologize for the long time without publishing here, but due to the rains in São Paulo, it’s more difficult to find scraps. But next week I’ll publish a new one!

Thanks!

Oi!

Hoje eu quero recomendar um site que eu achei por ajuda de um amigo meu. É o “instructables”. É um site onde você pode postar “passo-a-passo” de tudo e, portanto, você encontra lá instruções de como fazer muita coisa, que vai desde móveis, decorações até comidas e assim por diante.

Eu tenho passado meu tempo colocando as coisas deste blog lá, então, a partir de agora as imagens principais dos projetos também estarão disponíveis lá, mas o passo-a-passo continuará aqui.


Sobre novos projetos, em breve terei um novo. Eu peço desculpas pela demora, mas por causa das chuvas, tem sido difícil achar sucatas (secas) por aqui. Mas semana que vem terá um novo!

Obrigado!